
A bite sized cake on a stick? Sounds perfect. We absolutely love cake pops, and when they are Starbucks caked pops served with a nice coffee, they are even better. The pink little globes of sweet tasting heaven are great for when you are entertaining guests, or even if you are on your own. In this recipe we are going to learn how to make Starbucks cake pops.
What I love about these Cake Pops
This recipe was inspired by a baking session with my kids. We wanted to recreate the magic of Starbucks Cake Pops at home. It turned into a fun-filled afternoon of laughter, a bit of mess, and a lot of love. Every time I make these now, it reminds me of that special day.
Ever since my first bite of a Starbucks Cake Pop, I was hooked. The sweet, creamy texture and the fun of eating cake off a stick always felt like a special treat.
I personally love adding a dash of cinnamon to the cake mix for a little spicy twist. It’s a small change that brings a whole new flavor profile. Feel free to experiment with your favorite spices or extracts.
How To Make Starbucks Cake Pops
The best thing about our homemade Starbucks cake pops is that you don’t have to be a master baker. They are actually pretty forgiving. The reason for this is that the cake isn’t baked onto the stick, nor will you have to have to bake the balls of cake mixture separately. All you do is make a sponge and crumble it, before merging it with other ingredients, making it much easier to get perfect balls of tasty goodness.
Another reason that these Starbucks cake pops are easy to make at home is that you require next to no baking knowledge at all. Even the cake mixture is taken care of, as we use a premade mix that you can buy in pretty much any store.
Although these cake pops look fancy, you won’t need much specialized equipment. You will want a baking tin, a saucepan, and a couple of mixing bowls. Oh, and don’t forget your popsicle sticks!
To stop your cake pop heads from flying off, there is something special that you must ensure that you do. We use pure melted candy to act as a glue for your stick. Don’t skip this step!
The shape of the cake pops is important. If you want absolutely perfect globes you could consider using a cake pop former, put we find that using a small scoop, such as a melon baller, is just as easy. If you haven’t got either then two teaspoons will do the trick. Your Starbucks cake pops won’t be perfectly round, but there’s nothing wrong with going for the rustic look.

Ingredients
- Pillsbury Cake Mix: This is used as the base for the cake pops. You need to bake the sponge cake according to the packet instructions, then crumble it into medium-fine breadcrumbs.
- Creamy Supreme Vanilla Frosting: This frosting is mixed with the crumbled cake to help form the cake pops. It acts as a binder and adds flavor.
- Wilton Light Red Candy Melts: These candy melts are used for coating the cake pops. A portion of the melts is initially used to ‘glue’ the popsicle stick to the cake ball. The rest is melted with a bit of shortening and used as a coating for the cake pops.
- Crisco All Vegetable Shortening: This is mixed with the candy melts to create a smooth coating for the cake pops.
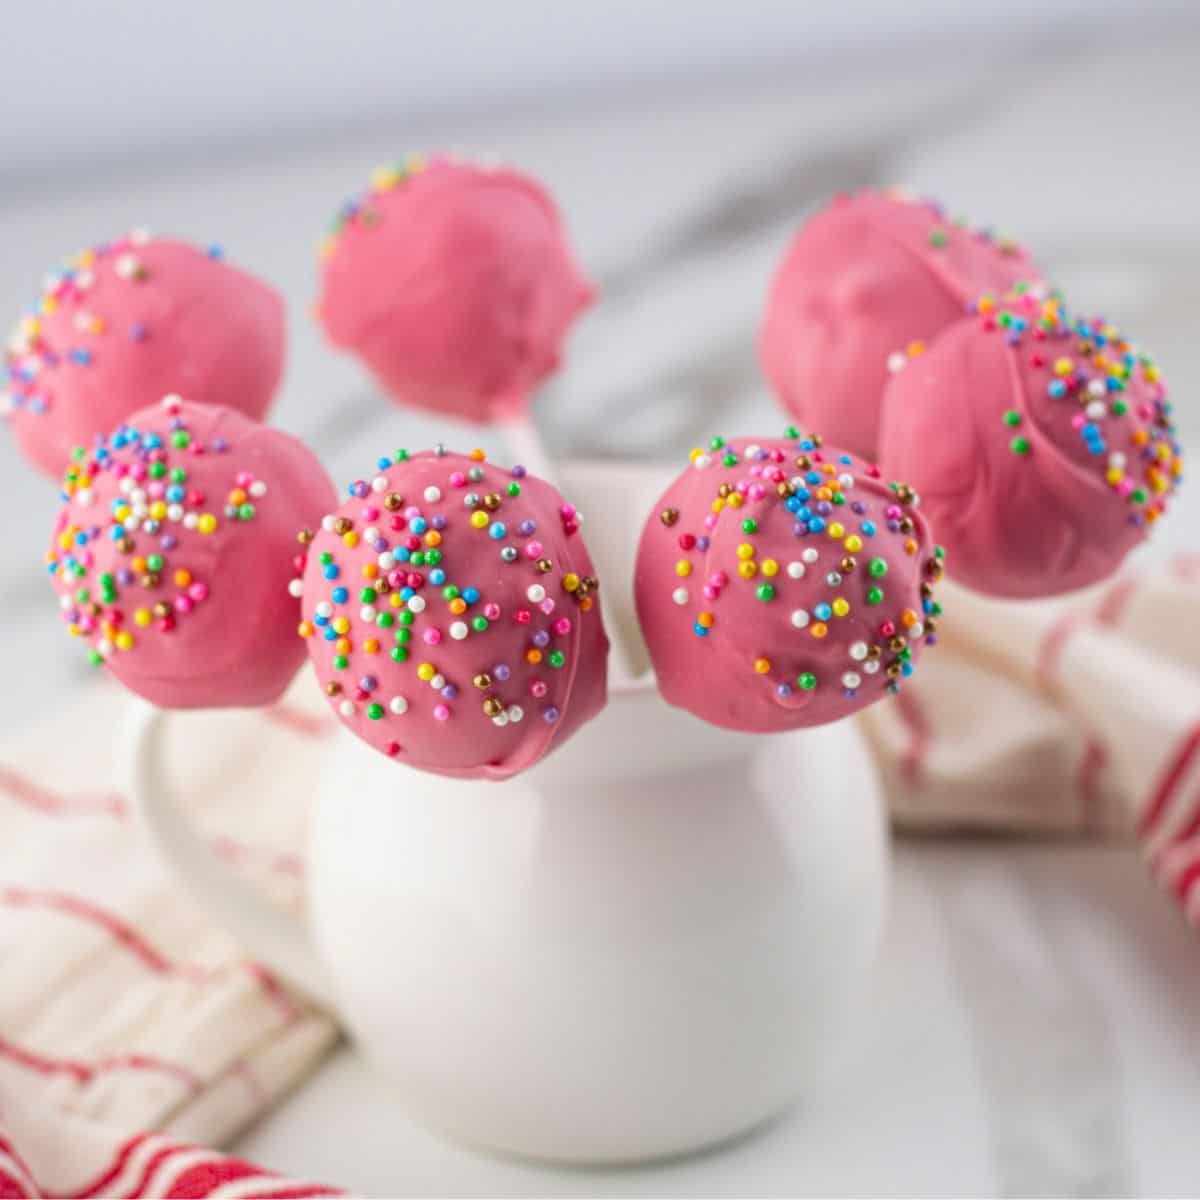
- Rainbow Sprinkles: These are used for decoration. After coating the cake pops with the candy melt mixture, they are dusted with sprinkles for a colorful finish.
Video Instructions

Starbucks Cake Pops
4
servings40
minutes35
minutes110
kcalCopycat Starbucks cake pops are truly a one of a kind recipe. The perfect treat to make any time of the year.
Ingredients
15 oz Pillsbury cake mix
4 teaspoons of creamy supreme vanilla frosting
1 bag of Wilton light red candy melts
1 scant teaspoon of Crisco all vegetable shortening
Rainbow sprinkles
Directions
- Make your sponge according to the packet instructions, and then leave on a wire rack to cool completely. Once cool trim away any dark sides or edges.
- Using clean hands, break the cake up and crumble it until it is in medium fine breadcrumbs. Then add your frosting and mix and knead well until you are able to form a ball.
- Roll the mixture into balls, if you have a melon scoop or similar, push the mixture into it, working all around until you have a perfect globe. Feel free to roll between your hands to get a smooth outer shape.
- In a separate pan add around 1/3 of your candy melts and heat gently until entirely melted. Working quickly and efficiently dip a popsicle stick into the melted candy and then stab it into the center of the cake pop ball. It will solidify and act as a sort of ‘glue’. When all are complete, place in the freezer for 15 or so minutes.
- In the meantime, add the rest of the candy melts to your pan and once melted add your shortening. Transfer your coating to a tall glass.
- Remove your cake pops from the freezer and, one by one, dunk into the glass. Once covered, remove, dust with sprinkles and stand upright in your foam block.
- Leave for one hour to set, then enjoy with a nice cappuccino.
Notes
- The best way to make your Starbucks cake pops perfect is to chill them before their dipping. Around 20 minutes in the freezer should do it. They will firm up nicely during this time.
Like this recipe?
Follow us @recipefairy on Pinterest
Tips and Tricks
- Here’s a little trick I learned: chilling the cake balls before dipping them in the coating makes a world of difference. I found this out the hard way during my first attempt when they kept falling apart!
- When dipping you cake pop there may be a temptation to ‘swirl’ it around in the coating to try and get it thick and even. Our advice is this. Don’t. You’ll end up with a mixture full of dead cake pops. Instead dunk your Starbucks cake pops headfirst into you coating mixture and out in one motion.
- Drips can be a little annoying, but here’s the answer. Hold your dunked Starbucks cake pop over the coating bowl and gently tap the back of the hand that is holding the cake pop. That way you avoid dislodging the dough from the stick.
- Cake pops are actually best stored in a sealed container. If you put them in the refrigerator you will find that they start to collect moisture. Nobody wants a wet soggy cake pop.
- If you haven’t got popsicle sticks don’t worry. At a push you can use toothpicks.
- Whilst we are talking about popsicle sticks, the shape doesn’t matter too much. You can use flat sticks or round sticks. The choice is yours.
- The easiest way to allow your cake pops to dry is by using a Styrofoam block to push your sticks into once you have coated them.
How Much is a Cake Pop at Starbucks
You won’t need to spend the $1.95 at starbucks per cake pop when you can make these at home yourself. For those asking this question, you can see the price in the table below. Our Starbucks birthday cake pop will not only save you time queuing but also you can avoid the cost.
| No. of Cake Pops | Price |
|---|---|
| 1 | $1.95 |
| 2 | $3.50 |
Conclusion
Although it may sound a little fiddly, Starbucks vanilla cake pops are surprisingly easy to make. The key is to be organized and set up a multi stage ‘production line’ prior to making.
Making these cake pops always brings a smile to my face, reminding me of cozy afternoons and joyful gatherings. I’d love to hear about your cake pop adventures! Did you add your own twist to the recipe? Share your stories in the comments below – I’m always excited to hear how these little treats bring joy to others.


Those look awesome😍😍😍